Here are some preliminary designs for the structure which will enclose the settlement chamber (SC) and pump system. Because my SC will be easily visible - not hidden somewhere - I am making a point to make it look aesthetically pleasing. I plan on enclosing it with a wood structure and will have floating pond plants in the top of it.
I will post more design images later so stay tuned.
Friday, June 14, 2013
Friday, June 7, 2013
Stock tank filter and bottom drain
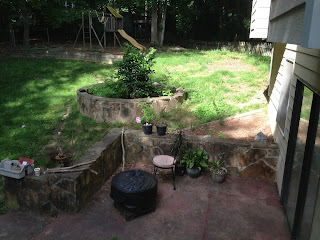
I will be using a 150 gal. stock tank, purchased from Tractor Supply, as my settlement chamber filter. Here it is along with its future home.
I also received the bottom drain a couple of days ago - a 3" Rhino I.
The plan is to build a wooden platform and structure around the tank. Doing this, and filling it full of floating plants, will make the filter system a decorative element.
Remove some of the rock from the wall
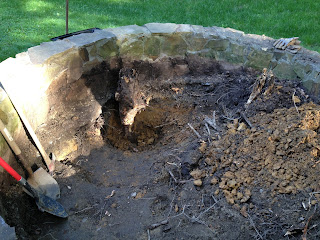
With the hole pretty much dug out the next task was to remove some of the rock from the wall - I removed rock from the top and the inside. Later when the liner is in place I will fold the top edge of it over the top of the wall and re-concrete the rock back. This will restore the visual finish of the wall and provide a secure, safe, and neat edge to the pond liner. As for the rocks removed from the inside...well, I did not have to remove them but chose to because I want to re-purpose them later as I finish in the skimmer and the waterfall elements.
With various tools I found that the best was a combination of the air chisel and patience.
During one break I decided to give the panoramic feature of my phone's camera a try. The following three images were are my attempts with varying amount of success.
With all that rock removed the next exercise will be to clean up rough and sharp concrete points, cut back on the concrete foundation, and finish up the dirt sides all of which will end with smooth and slightly sloping sides.
Step 1: Dig a hole
A Memorial Day weekend gave me an extra day which was well used and appreciated. With nearly 2 days, and help from family members, I was able to get the lion's share of the hole dug. But, first, a few pictures before shovel hit dirt.
In that last picture you can see the approximate locations of the skimmer and the waterfall.
I was fortunate that the location was in tree shade for all but 2 hours of the day. That, and a light breeze, made for a wonderful work day. I planned for a 4' deep pond which means about 3.5' foot had to be dug out. The digging begins.
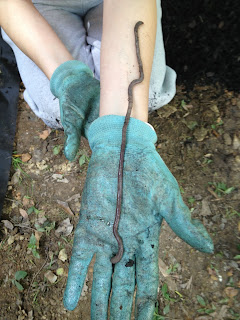
While digging I found about a million earth worms with this one being the biggest I have ever seen.
I got tired of throwing the shovel of dirt onto the pile so I started using buckets - fill them up and carry them out. It slowed down the process but did make the overall effort easier.
In the following pictures you can see that I was working my way around and my bucket self was getting smaller and smaller.
Eventually I had to dig out the bucket shelf and lift the buckets of dirt from the bottom up and and set them on the wall. From there my wife, Lynn, would empty them. With three buckets we had a good system going.
Lynn approves of my work.
In that last picture you can see the approximate locations of the skimmer and the waterfall.
I was fortunate that the location was in tree shade for all but 2 hours of the day. That, and a light breeze, made for a wonderful work day. I planned for a 4' deep pond which means about 3.5' foot had to be dug out. The digging begins.
While digging I found about a million earth worms with this one being the biggest I have ever seen.
I got tired of throwing the shovel of dirt onto the pile so I started using buckets - fill them up and carry them out. It slowed down the process but did make the overall effort easier.
In the following pictures you can see that I was working my way around and my bucket self was getting smaller and smaller.
Lynn approves of my work.
Subscribe to:
Comments (Atom)


