I started Saturday morning with my weekend goals in hand. I did not achieve them all but certainly can not complain about what I was able to do. The first task was to pour a concrete floor under the SC's structure. Although certainly not necessary it was greatly desired as I did not what that area being yucky with weeds and weird mushrooms. I began by tweaking some plumbing lines, adding a few more boards to hold back dirt, and leveling off the last bit of ground I had not gotten to yet. The drain line for the SC's tank is being extended to a future turtle pond. I needed to glue a few bends in place to get it going in the correct direction.

Then I added a few more temporary bends just to keep it less likely to get soil knocked in the pipe.

During a previous rainy Saturday I had gotten most of the dirt flat and sloped towards the floor's drain. Following on what I did then I marked some lines around the inside perimeter to note where the top of the concrete was to be and starting mixing. The following pictures show the progress as I use the marks to ensure I get the correctly slope.


2 hours and 10 bags later I was done.


Not the best finish job in the world but I will take it. I now have a functional, neat and clean place to place the pump. With that marked off my list I moved on to the next task - replacing the stone along the top edge of the pond's wall. I had removed the stone with the idea of re-installing it with a gap (/notch/slot) along the inside edge. This gap would allow me a place to tuck the pond liner. First I needed to a way to create that notch. I chose to use boards which would be placed along the inside edge.


As you can see in those pictures, the boards are made to provide a 3" gap on the inside. This will allow for about 6" or mortar along the outside to hold the rocks in place. The last thing for Saturday evening was to determine what rocks to place where. I had quite a pile to chose from as I had removed not only from the top but from the inside also. After digging through the pile and trying different options, here is what I finished with.


With those pictures you can get an idea of how the boards will be used - they will give me 5/8" gap along the inside with that same thickness of mortar along the outside.
Sunday morning started with wrapping the boards with aluminum foil.


Because I have to slide these boards out later I wanted to eliminate any chance of the mortar attaching to the boards and trying to thwart my efforts. Originally I planned on using wax paper but decided to go with foil as I felt it would be easier to manipulate. With all that in place I started the mortar process.


So far, so good. At least it seems that way. I guess I will find out when I remove the boards and check the rocks adhesion. My initial goals were to have that done by Saturday evening so I could fill the joints on Sunday but that did not happen and I have joint filling to do next time I am out there.
After a quick PB&J sandwich for lunch I returned to big-ticket task #3 - start connecting the tank. For the final time I set the tank back in the SC structure and started connecting its drain line which, before being installed, looks like this:


And after being installed it looks like this:
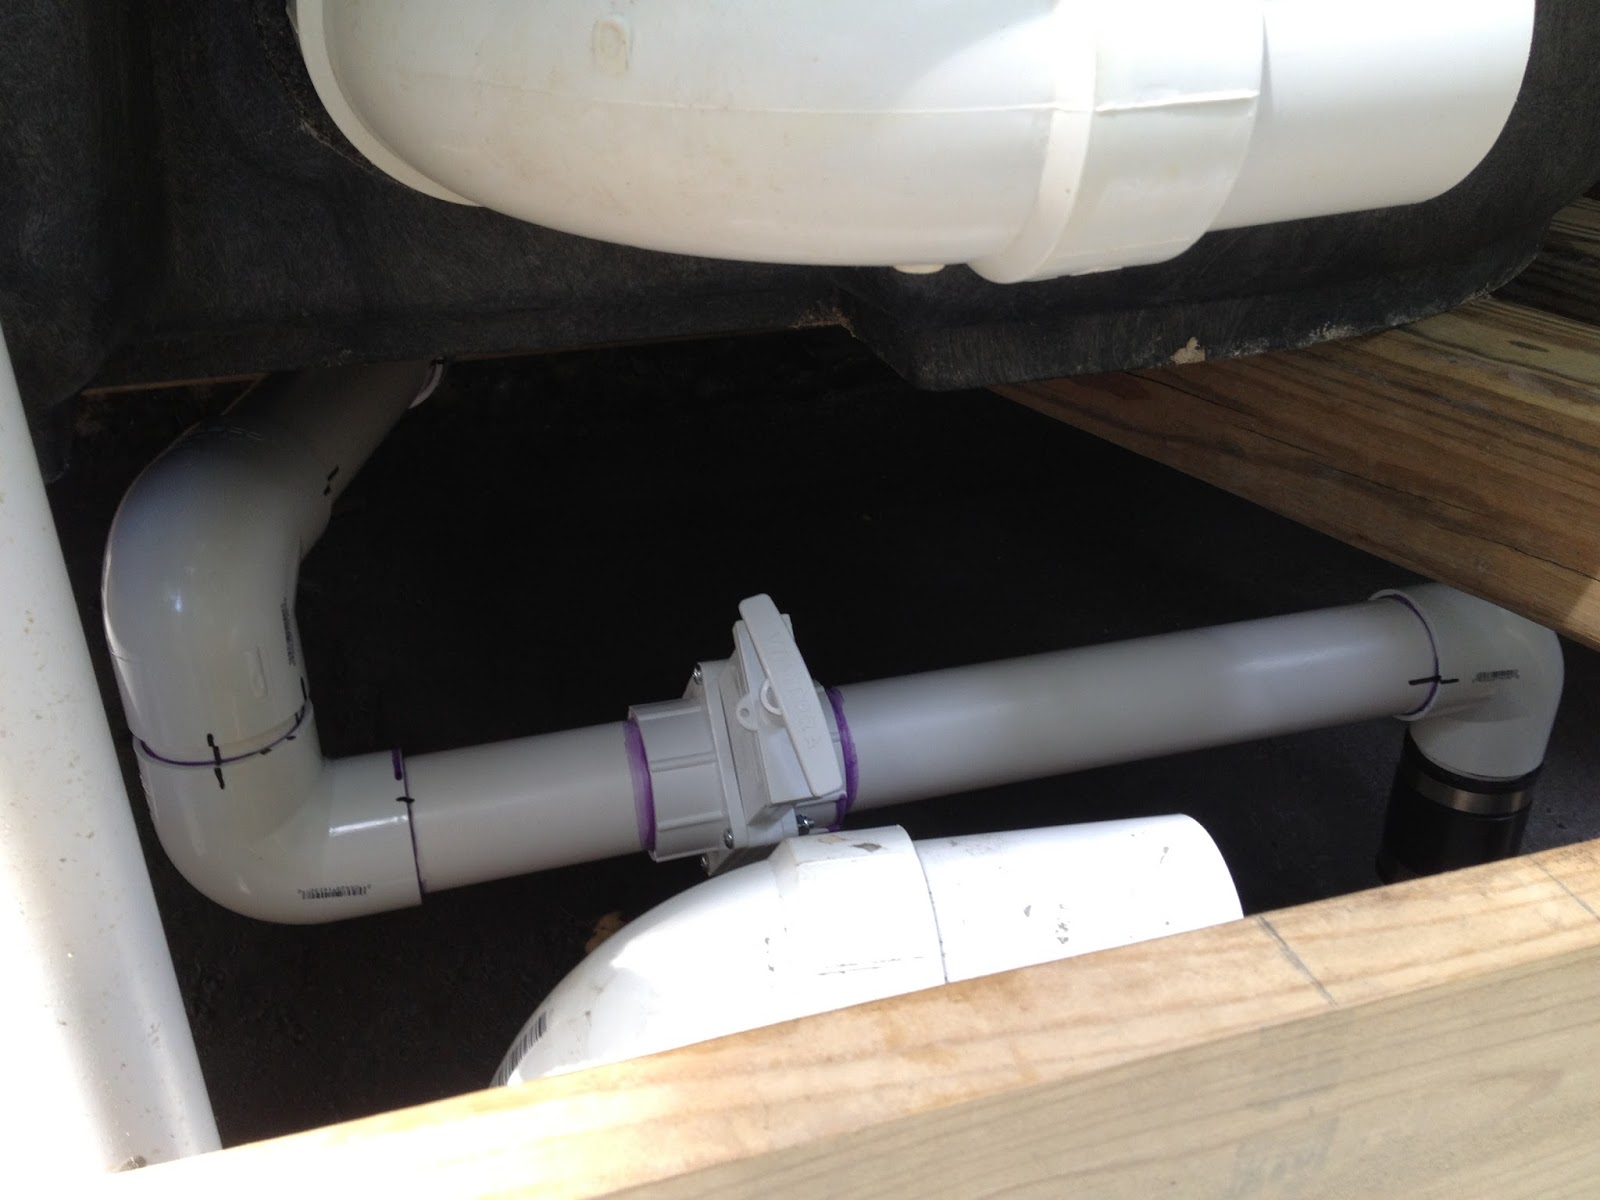

Now that I can drain the tank I set efforts on the connection that gets water into the tank.

I gathered the pump from the garage and set it in place and sat back and thought about how it was going to be connected. I have two lines to supply the pump - this tank and the skimmer line. They both need gate valves and then be joined and run through a union before connecting to the pump. Then the pump's output runs through a union and connects to the return line to the pond. Sounds simple but figuring out how it is all going to go together took awhile. About the time I figured out a plan I ran out of time. Here is how I left it with two elbows pointing in the right direction.


As I mentioned earlier, I failed to meet all my goals for the weekend. I was not able to get the pump connected, joints filled in the rocks, nor cement in the bottom of the tank (to provide a sloped surface towards the drain hole) but I will not complain as I did have success with what I accomplished.


