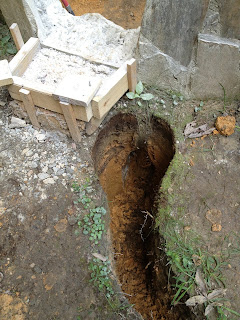
With the inside walls complete I was finally able to dig what would be the true bottom of the pond and, yes, dig for a bottom drain line. For me this is a milestone as the BD was ordered early on in the project and has been patiently waiting on my shop bench for its turn. Well, its time...
A while back, when digging the trench on the outside, I opened a hole to the inside which is when rain water flooded my trench. All that is gone now and that connecting hole is where I will start. With the pond bottom cleaned out and sloped towards the BD location I started digging a hole.
The white bucket is my step for getting in and out of the pond while the orange one is my dirt transport device. I glued an elbow on to the DB.
And then I glued the together some of the outside-of-the-pond components.
The gate valve is the first component once the line exits the pond and that will be used if I ever have to shut off the flow to the SC. The T is for a stand pipe. If I should need to drain the line (with the gate valve closed) I will be able to do so by sticking a hose down the stand pipe and pulling the water out.
I determined the length of pipe needed to go between the 2 and made this.
That SC structure makes for a great workbench. Here is the trench on the outside.
And here is the pipework ready to go in.
And here it is in place with some cement to hold it fast.
Because the gate valve is 2' below grade I desired a way to keep it safe from being buried in dirt. Here is my solution...I purchased 2 concrete forms, one smaller than the other, and filled the area in between with concrete.
As visible in the above pictures, I also purchased a threaded rod so that I could extend the handle. While working on that tube thingie I also cemented the skimmer in place. Here is the base of where the skimmer will sit.
This is an un-level un-even surface. Much like laying tile I made an 'X' shape of cement...
...and pressed the skimmer in place, squishing the concrete as needed, until it was level and straight.
In no way did this secure the skimmer any but it did provide the exact surface needed to support it. Over the course of a couple of days I fill the sides between the skimmer and wall, with mortar which will secure it in place. Because of the wedge shape of the skimmer and the corresponding shape of the filled-in mortar, it will resist being pushed out by the pond's water pressure. Just to be safe I will add additional metal straps later to aid in resisting this push-out force. I do not have any pictures specifically of the mortar being filled in but it is visible in some of subsequent pictures of the addition plumbing work done on/around the skimmer. But, for now, that is all.


No comments:
Post a Comment